You can now establish 2FA to protect your Asporea Hosting account.
Time-based 2FA provides an extra layer of security for your online accounts by making it more difficult for someone to gain unauthorized access, even if they have your password. It also ensures that the second factor cannot be easily stolen or duplicated.
Two-factor authentication (2FA) is a security measure that requires you to provide two forms of identification when logging in to an online account. The first factor is typically something you know, such as a password, and the second factor is something you have, such as a mobile device.
Time-based 2FA uses a time-based one-time code as the second factor. This one-time code is generated by an app, such as Google Authenticator. The code is linked to your profile on a specific website and changes at regular intervals (usually every 30 seconds).
When prompted by the service you are logging in to, you enter the current one-time code in addition to your password to complete the login process.
Here's how you do it:
- Get prepared by visiting Google Authenticator and downloading the Google Authenticator app on your mobile device.
You'll need this to generate your one-time code as part of the login process. - Login to your account at Asporea Hosting
- Using the personalised menu in the top-right hand corner, select Security Settings

- To commence 2FA setup, press the green button labelled Click here to Enable
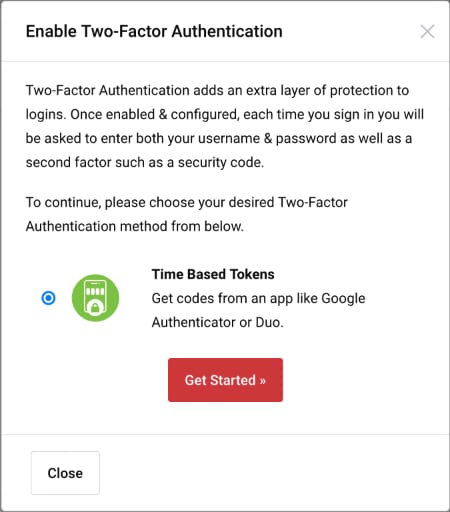
- Press the Get Started button
On the screen you will be presented with a bar code (not shown here). This bar code is specific to your account. - Open Google Authenticator on your mobile device, and press the Plus (+) button
This will add a new account to your Google Authenticator app - In Google Authenticator, choose the Scan a QR code button
- Point your phone's camera at the bar code presented on the screen
You will see the website appear in your Google Authenticator app, with a six digit code.
You need to Enter the 6-digit code that the application generates to verify and complete setup. - Wait for the code to change then enter the number that appears in Google Authenticator, then press Submit
You should not delay in typing the code and pressing the submit button. - Write down the backup code and keep it safe
Write down your backup code and store it in a safe place. You will need this if you lose your device or can't access your 2FA code. - Press Close to complete the 2FA setup process.
The next time you login you will need to use the code in Google Authenticator when you login.
